Why Are My Cookies Oily or Greasy? 11 Proven Fixes for Perfect Texture
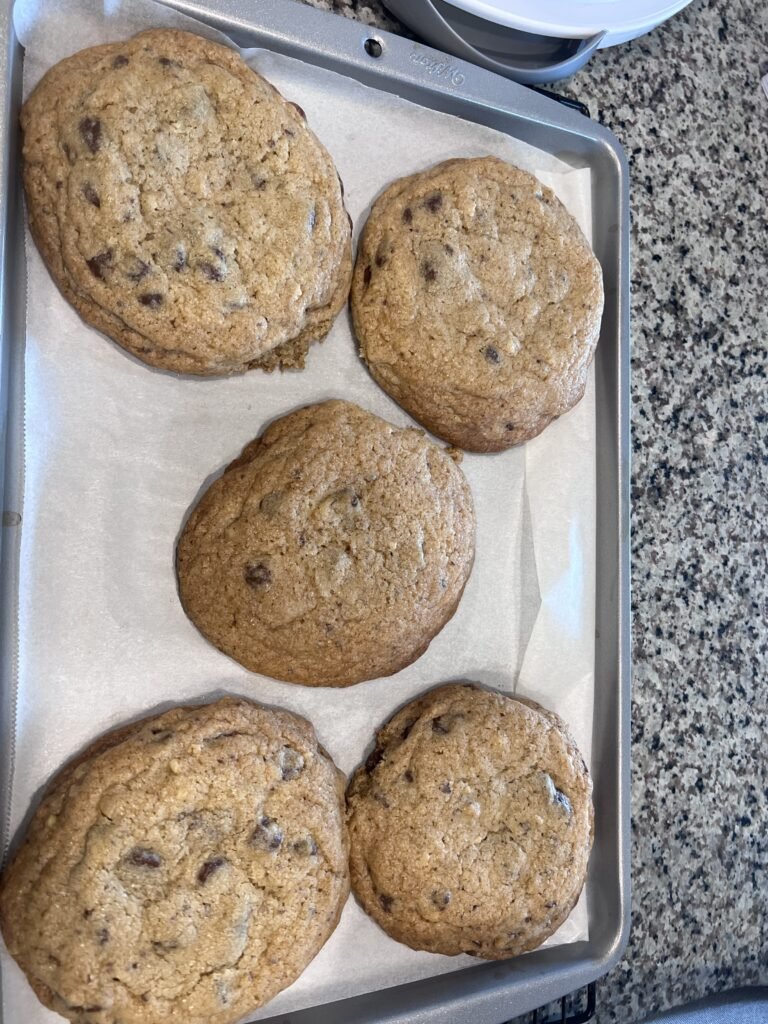
Quick answer:
Cookies become oily or greasy when there’s too much fat, butter was too warm, dough wasn’t chilled, or the flour-to-fat ratio is off. The quick fix is chilling the dough for 30 minutes before baking. For future batches, reduce butter by 1-2 tablespoons and add 2 tablespoons of flour.
Introduction
You pull a tray of cookies from the oven, and they look beautiful, golden brown, perfectly shaped, studded with chocolate. You let them cool, anticipation building. But when you finally grab one, your fingers come away shiny. The cookie leaves a greasy ring on the paper towel. The taste is… well, it’s just off. Oily. Heavy. Not the tender, buttery cookie you were dreaming of. If you’ve ever found yourself asking “why are my cookies oily or greasy?” you’re not alone.
Why do my cookies leave a greasy residue on my fingers? The answer usually comes down to one of several issues: too much butter or fat, butter that was too warm when mixed, insufficient flour, or dough that wasn’t chilled properly. The good news is that greasy cookies are almost always fixable; often with a simple adjustment like chilling or adding a bit more flour.
In this comprehensive guide, we’ll explore exactly why are my cookies oily or greasy and give you eleven proven strategies to fix the problem and prevent it from happening again.
Let’s soak up that grease.
Why Are My Cookies Oily or Greasy? Understanding the Science
Before we can fix greasy cookies, we need to understand what causes excess oiliness. Cookie greasiness is governed by several key factors:
Fat-to-Flour Ratio: Fat (butter, oil, shortening) creates tenderness. When there’s too much fat relative to flour, the excess fat has nowhere to go it pools on the surface and leaves a greasy residue.
Butter Temperature: When butter is too warm, it doesn’t properly emulsify with the sugar and eggs. The fat separates and later seeps out during baking.
Dough Temperature: Warm dough causes butter to melt too quickly, allowing fat to separate and pool on top of the cookie.
Over-Creaming: Excessive creaming can break the fat emulsion, causing butter to separate.
Incorrect Fat Type: Some fats (like margarine or low-quality butter) have higher water content, which can affect how the fat behaves during baking.
Baking Temperature: Too low an oven temperature can cause butter to melt and separate before the cookie structure sets.
Now that we understand the factors, let’s explore exactly why are my cookies oily or greasy in specific scenarios.
11 Reasons Your Cookies Are Oily or Greasy
- You Used Too Much Butter (The #1 Cause)
Why are my cookies leaving a greasy ring on the paper towel? This is the most common answer.
The problem: Every cookie recipe has a specific fat-to-flour ratio for a reason. When you add extra butter or use a heaping measurement, the excess fat has nowhere to go. It seeps out during baking, leaving your cookies greasy.
The solution:
· Measure butter accurately (1 stick = ½ cup = 113g)
· For future batches, reduce butter by 1-2 tablespoons
· Use a kitchen scale for precision
How much butter is too much? If your recipe calls for 1 cup (2 sticks) and you’re using 1¼ cups, that extra ¼ cup (4 tablespoons) is likely causing the grease.
- Your Butter Was Too Warm When Mixed
The problem: When butter is too soft or melted, it doesn’t properly cream with sugar. The fat doesn’t get fully incorporated into the dough structure. Instead, it remains as tiny pools of liquid that later seep out during baking.
The solution:
· Use butter at cool room temperature (65-67°F)
· Butter should give slightly when pressed but still hold its shape
· If your butter is too warm, chill the dough immediately
Signs of butter too warm: The dough looks greasy or shiny before baking, and it feels slick to the touch.
- You Didn’t Use Enough Flour
The problem: Flour absorbs fat and provides structure. When there’s too little flour, the fat has nothing to absorb it. The excess fat rises to the surface during baking.
The solution:
· Add 2-3 tablespoons of flour to your recipe
· Use the spoon and level method to measure flour accurately
· The dough should be soft and slightly tacky, not greasy or wet
Signs of too little flour: Dough is very soft, greasy to the touch, and doesn’t hold its shape well.
- You Over-Creamed the Butter and Sugar
The problem: Creaming is essential, but over-creaming can actually break the emulsion. The fat separates from the sugar, and that separated fat later leaks out during baking.
The solution:
· Cream butter and sugar for 2-3 minutes only
· Stop when mixture is lightened in color and slightly fluffy
· Avoid high speeds for extended periods
Signs of over-creaming: The mixture looks pale, almost white, and may appear greasy or separated at the edges.
- You Didn’t Chill Your Dough
The problem: Warm dough causes butter to melt too quickly in the oven. Instead of melting gradually and being absorbed, the fat liquefies immediately and pools on top of the cookie.
The solution:
· Chill dough for at least 30 minutes before baking
· For best results, chill for 2-24 hours
· Bake directly from the refrigerator
Why chilling works: Cold dough means cold butter. Cold butter melts slowly, giving the flour time to absorb it before it can pool on the surface.
- You Used Margarine or Low-Quality Butter
The problem: Margarine and some low-quality butters have higher water content and different fat structures. They don’t emulsify as well as high-quality butter, leading to separation and greasiness.
The solution:
· Use European style butter (82-86% butterfat)
· Avoid margarine or “vegetable oil spreads”
· If using salted butter, reduce added salt
Butter quality guide:
Butter Type Fat Content Grease Risk
European-style 82-86% Low
Standard American 80% Medium
Margarine 80% with additives High
Light/Reduced fat 40-60% Very high
- You Used Too Much Brown Sugar
The problem: Brown sugar contains molasses, which is acidic and can affect how fat emulsifies. Too much brown sugar relative to white sugar can contribute to a greasy texture.
The solution:
· Balance your sugar ratio: equal parts brown and white sugar
· For less greasy cookies, use more white sugar than brown
· Ensure brown sugar isn’t clumpy or overly moist
- Your Oven Temperature Was Too Low
The problem: When the oven is too cool, cookies bake slowly. The butter melts completely and runs out before the cookie structure can set and trap the fat.
The solution:
· Use an oven thermometer to verify temperature
· Bake at 350-375°F for most drop cookies
· If your oven runs cool, increase by 25°F
- You Used Oil Instead of Butter
The problem: Oil is 100% fat and never solidifies. While oil can be used in cookies, it behaves differently. Oil-based cookies are often greasier because the fat never gets absorbed into a solid structure.
The solution:
· If a recipe calls for butter, use butter
· If you must use oil, reduce the amount by 1-2 tablespoons
· Add 2 tablespoons of extra flour to absorb the oil
- Your Dough Was Over mixed After Adding Flour
The problem: Overmixing develops gluten, which can actually squeeze fat out of the dough structure. The fat separates and later appears as grease on the surface.
The solution:
· Mix dry ingredients into wet just until no flour streaks remain
· Stop immediately, no extra mixing
· Fold in add-ins by hand
- You Added Too Many High-Fat Add-Ins
The problem: Chocolate chips, nuts, and certain other add-ins contain significant fat. When you add too many, you’re effectively increasing the total fat content of the dough.
The solution:
· Keep add-ins to 2 cups or less per batch
· Reduce butter slightly when using many add-ins
· Use mini chocolate chips for better distribution
How to Fix Oily, Greasy Cookies (7 Rescue Methods)
Your cookies are already baked and greasy. Here’s what you can do:
Rescue Method #1: Blot with Paper Towel
Place baked cookies on a paper towel-lined plate. Press another paper towel gently on top. This absorbs surface grease. Works best when cookies are still warm.
Rescue Method #2: Return to Oven Briefly
Place greasy cookies on a fresh paper towel-lined baking sheet. Bake at 300°F for 2-3 minutes. The heat can help release more grease, which the paper towel absorbs.
Rescue Method #3: The Freezer Trick
Place greasy cookies in the freezer for 15-20 minutes. The cold solidifies the surface fat, making them less greasy to the touch (though they’ll still have the same fat content).
Rescue Method #4: Crumble for Crust
Crumble greasy cookies and use as a pie crust. The extra fat actually helps the crust hold together beautifully. Mix with a little melted butter and press into a pan.
Rescue Method #5: Cookie Butter
Greasy cookies are ideal for cookie butter. The high fat content makes them grind smoothly. Process in a food processor until spreadable.
Rescue Method #6: Ice Cream Mix-In
Crumble greasy cookies into ice cream. The fat content adds richness, and the texture works well in frozen desserts.
Rescue Method #7: Repurpose as Topping
Use crumbled greasy cookies as a topping for yogurt, oatmeal, or pudding. The fat adds flavor without being noticeable as grease.
Quick Reference Troubleshooting Chart
Problem Likely Cause Solution
Cookies leave greasy ring–Too much butter Reduce butter by 1-2 tbsp
Cookies shiny, slick surface– Butter too warm Chill dough 30+ minutes
Cookies greasy and flat– Too little flour Add 2-3 tbsp flour
Cookies greasy and dense– Over-creamed Cream only 2-3 minutes
Cookies greasy only in summer– Dough too warm Always chill before baking
Cookies greasy with oily pools– Margarine/ low-quality butter Switch to European butter
Cookies greasy and pale– Oven too low Verify temp with thermometer
Cookies greasy with many– chips Too many add-ins Reduce chips; add flour
How to Prevent Greasy Cookies: Best Practices
Before You Start
· Use European style butter for best results
· Bring butter to cool room temperature (65-67°F)
· Measure flour using spoon-and-level method
· Ensure oven temperature is accurate (use thermometer)
During Mixing
· Cream butter and sugar only 2-3 minutes
· Add eggs one at a time, beating well after each
· Mix dry into wet just until combined
· Fold in add-ins by hand
Before Baking
· Always chill dough for at least 30 minutes
· For very warm kitchens, chill for 1-2 hours
· Scoop dough while cold
· Use parchment paper (absorbs some grease)
During Baking
· Bake at 350-375°F (verify with thermometer)
· Don’t crowd the pan (allows proper browning)
· Rotate sheet halfway through
The Butter Temperature Guide
Butter Temperature Appearance Result
Below 60°F (too cold) Hard, won’t dent Dense cookies, possible grease
65-67°F (ideal) Slight dent, holds shape Perfect balance, no grease
68-72°F (soft) Dents easily, slightly shiny Potential grease
Above 75°F (too warm) Shiny, oily, bending High risk of greasy cookies
How to quickly cool warm butter: Cut into small pieces and refrigerate for 10-15 minutes.
The Flour Adjustments for Greasy Dough
If your dough consistently comes out greasy, try these adjustments:
Problem Adjustment
Dough feels slick and greasy Add 2 tbsp flour
Dough is very soft and wet Add 3-4 tbsp flour
Cookies spread and leave grease Add 2 tbsp flour + chill 1 hour
Dough is greasy only on warm days Add 1-2 tbsp flour + chill
Final Thoughts: Your Grease-Free Future
If you’re still wondering why are my cookies oily or greasy, remember this: balance is everything. The right amount of fat, properly managed with enough flour and proper chilling, creates tender cookies without the grease.
The solutions we’ve covered, reducing butter, measuring flour correctly, chilling dough, using quality butter are your tools for achieving perfectly balanced cookies every time.
Understanding why greasiness happens transforms you from a frustrated baker into a confident one. You now know that greasy cookies aren’t a mystery, they’re simply your ingredients and techniques asking for a little adjustment.
So go preheat that oven, chill that dough, and bake your least greasy, most perfect batch yet.
Ever had a cookie that left a grease stain on your shirt? Drop a comment below—I’d love to hear your story! Check this link out ➡️Award-Winning Chocolate Chip Cookie
Happy baking! May your cookies be tender, buttery, and never greasy. 🍪✨