How to Handle Flour for Better Cookie Texture: 9 Essential Techniques
Direct Answer Short:
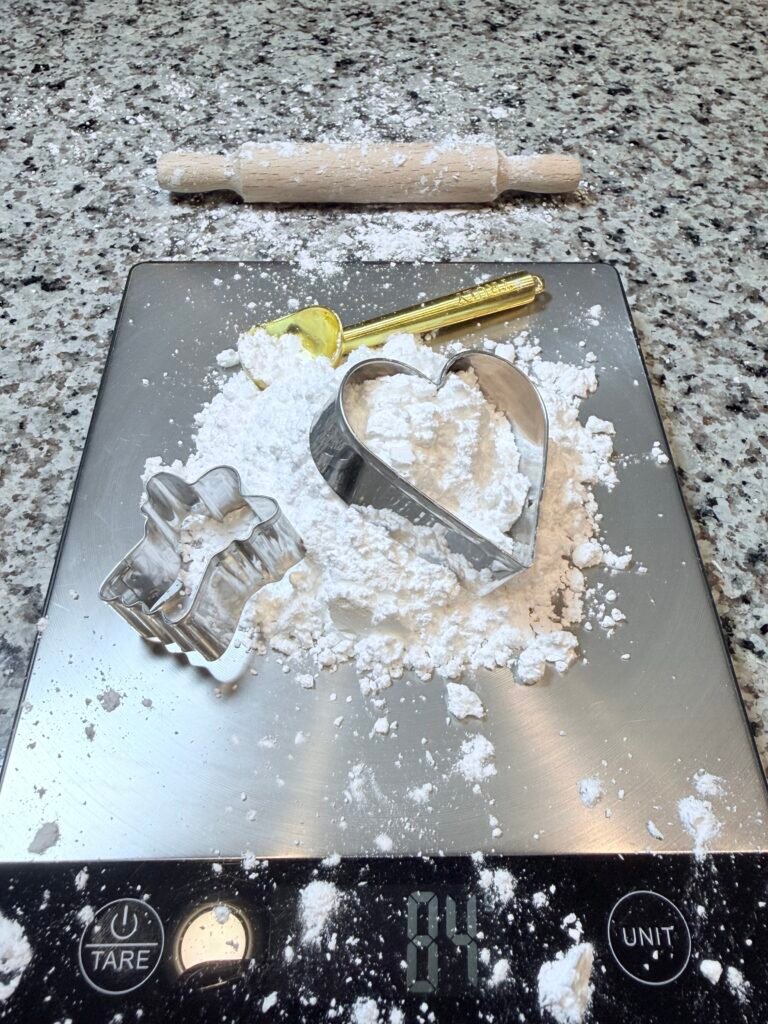
Proper flour handling is essential for perfect cookie texture. The key techniques are spooning and leveling flour (never scooping), sifting for aerated, tender cookies, and mixing just until combined to prevent gluten development. These methods control moisture absorption and structure, directly impacting whether your cookies turn out chewy, tender, or tough. In this post you’ll learn How to handle flour for better cookie texture.
1.Introduction: The Foundation of Cookie Texture
You’ve followed the recipe perfectly. Your butter was the ideal temperature. Sugar ratio was spot on. Your chilling game was strong. However, your cookies still aren’t quite right too dense, too tough, or oddly dry. What went wrong?
The answer might be hiding in plain sight: how you handle your flour.
If you’ve never considered the importance of handling flour for better cookie texture, you’re not alone. Most home bakers treat flour as a simple “dump and mix” ingredient. But flour is actually a complex ingredient with its own personality. How you measure it, mix it, and treat it dramatically affects your final results.
In this comprehensive guide, we’ll explore exactly why flour handling matters, the science behind it, and nine essential techniques that will transform your cookie texture.
Let’s get flour-savvy.
2.Why Flour Handling Matters: The Science
Before we dive into techniques, most importantly let’s understand what’s actually happening with your flour.
Flour Absorbs Moisture
Flour is hygroscopic—it absorbs moisture from the air. On humid days, your flour can contain significantly more moisture, which affects your dough consistency. On dry days, it can be drier. This is why flour handling is especially important in different seasons.
Gluten Development
When flour mixes with liquid, two proteins—glutenin and gliadin—combine to form gluten. Gluten creates structure and elasticity. In cookies, we want some gluten (for structure) but not too much (which creates toughness). How you handle flour directly controls gluten development.
Surface Area Matters
The surface area of your flour particles affects how quickly they absorb moisture. Sifting increases surface area, allowing for more even hydration. Scooping compacts flour, reducing surface area and affecting absorption.
Fat Coating
When you mix butter into flour, the fat coats the flour particles. This coating prevents gluten from forming too quickly, which is why properly creamed butter creates tender cookies.
Now that we understand the science, let’s explore exactly how to handle flour for better cookie texture.
3. 9 Essential Flour Handling Techniques for Better Cookies
- Spoon and Level (Never Scoop)
Why does measuring flour correctly matter? This is the #1 most important technique.
The problem: Scooping your measuring cup directly into the flour bag compacts the flour. You can end up with 25% more flour than the recipe intended. This excess flour absorbs too much moisture, creating dry, dense, tough cookies.
The solution: Use the spoon and level method:
- Fluff the flour in its container with a spoon
- Spoon flour into your measuring cup until it overflows
- Level off the top with the straight edge of a knife
The science: Spooning and leveling gives you a consistent, accurate measurement every time. No more guessing, no more compacted flour.
The result: Cookies with perfect moisture balance—not too dry, not too wet.
- Sift When the Recipe Calls For It
The problem: Sifting isn’t just for “old-fashioned” recipes. Sifting aerates the flour, removes lumps, and creates a lighter, more tender texture. It also ensures even distribution of dry ingredients like baking soda and salt.
The solution: Sift flour when the recipe specifically calls for it. Sifting is especially important for:
· Delicate cookies (sugar cookies, shortbread)
· Recipes with a high flour-to-fat ratio
· Cookies where a tender crumb is desired
The science: Sifting breaks up clumps and incorporates air, making the flour lighter. This creates a more delicate, tender cookie.
The result: Softer, more delicate cookies with a finer crumb.
- Weigh Your Flour (The Most Accurate Method)
The problem: Volume measurements (cups) are inherently inaccurate. One cup of flour can weigh anywhere from 120g to 160g depending on how it’s scooped.
The solution: Use a digital kitchen scale to measure flour by weight. This is the most accurate method and eliminates measurement variability entirely.
The standard: 1 cup of all-purpose flour = 120-128 grams (depending on brand). Check your recipe’s recommended weight.
The science: Weight measurements are consistent, repeatable, and unaffected by scooping technique or humidity.
The result: Consistent, predictable results every single time.
- Mix Just Until Combined (No Over mixing)
The problem: Over mixing develops gluten, which makes cookies tough, dense, and dry. Once gluten forms, it’s nearly impossible to undo.
The solution: Mix dry ingredients into wet just until no flour streaks remain. Stop immediately.
The science: Gluten development begins as soon as flour meets liquid. Therefore, the more you mix, the more gluten develops. For tender cookies, you want minimal gluten.
The result: Tender, delicate cookies that aren’t tough or chewy in a bad way.
- Use the Right Flour for Your Goal
The problem: Using the wrong flour type can sabotage your texture goals. Not all flour is created equal.
The solution: Match your flour to your desired texture:
Flour Type Protein Content Best For
Cake flour 6-8% Delicate, tender, fine-crumbed cookies
Pastry flour 8-10% Tender, slightly structured cookies
All-purpose flour 10-12% Most cookies (versatile)
Bread flour 12-14% Chewy, structured cookies
The science: Protein content affects gluten development. More protein = more gluten = chewier, more structured cookies. Less protein = less gluten = tender, more delicate cookies.
The result: Cookies that achieve the exact texture you’re targeting.
- Store Flour Properly
The problem: Flour absorbs moisture from the air, which affects its behavior in recipes. Humidity can change flour’s moisture content.
The solution: Store flour in an airtight container in a cool, dry place. Avoid storing flour near the stove or dishwasher.
The science: Airtight storage prevents flour from absorbing moisture or odors. This keeps your flour consistent from batch to batch.
The result: More consistent, predictable baking.
- Use the “Paddle” Attachment, Not the “Dough Hook”
The problem: The dough hook is designed for bread—it develops gluten aggressively. The paddle attachment is gentler and better for cookies.
The solution: Use the paddle attachment for cookie dough. It incorporates ingredients without overdeveloping gluten.
The science: The paddle’s flat, slotted design cuts through the dough gently, distributing ingredients without creating excessive gluten.
The result: Tender, properly textured cookies.
- Add Flour in Stages
The problem: Adding all the flour at once can create lumps and lead to overmixing as you try to incorporate them.
The solution: Add flour in two or three additions, mixing briefly after each. This allows for even incorporation with less mixing.
The science: Adding flour gradually allows it to be incorporated more evenly with minimal mixing. This reduces the risk of gluten overdevelopment.
The result: Smoother, more consistent dough with less mixing.
- Rest Your Dough (Flour Hydration)
The problem: Flour takes time to fully absorb moisture. Rushing to bake can result in uneven texture.
The solution: Rest your dough in the refrigerator for at least 30 minutes (preferably 2-24 hours). This allows the flour to fully hydrate.
The science: During resting, flour particles gradually absorb moisture from the other ingredients. This creates a more cohesive dough with better texture.
The result: Cookies that are more tender, flavorful, and evenly textured.
4. Common Flour Mistakes (And How to Fix Them)
Mistake- The Problem -The Fix
Scooping flour directly =Too much flour (compacted),= dry/tough cookies- Use spoon and level method
Not sifting when needed =Lumpy flour, dense cookies- Sift when recipe calls for it
Over mixing after adding flour= Tough, dense cookies- Mix just until combined
Using the wrong flour= Wrong texture (too chewy, too delicate)- Match flour to desired texture
Adding all flour at once= Lumps, over mixing- Add in 2-3 stages
Skipping the rest/hydration= Uneven texture, dry cookies- Rest dough 30+ minutes
Not weighing flour= Inconsistent results- Use a digital scale
Improper storage= Inconsistent, stale flour- Store in airtight container
5. Quick Reference Troubleshooting Chart
Cookie Issue Likely Flour Handling Problem Solution:
Cookies are dry and crumbly= Too much flour (scooped) Use spoon and level method
Cookies are tough and dense= Over mixed Mix just until combined
Cookies are flat and greasy= Too little flour Measure correctly; add 2 tbsp
Cookies are uneven, lumpy= Flour not sifted Sift when called for
Cookies are too delicate/falling apart= Wrong flour type (too low protein) Use higher protein flour
Cookies are too chewy (unpleasantly)= Wrong flour type (too high protein) Use lower protein flour
Cookies spread too much= Flour not resting (hydration) Rest dough 30+ minute
6. Flour Types and Their Impact on Cookie Texture
All-Purpose Flour (10-12% Protein)
Best for: Most cookies (chocolate chip, oatmeal, sugar).
Texture: Balanced—chewy but not too tough, tender but not too delicate.
Tips: Ideal starting point. Works for almost any cookie recipe.
Bread Flour (12-14% Protein)
Best for: Chewy cookies, Levain-style thick cookies.
Texture: Very chewy, structured, holds shape well.
Tips: Great for cookies that need to hold up to lots of add-ins.
Cake Flour (6-8% Protein)
Best for: Delicate, tender cookies (shortbread, tea cookies).
Texture: Very tender, delicate crumb.
Tips: Creates very soft, almost melting-in-your-mouth texture.
Pastry Flour (8-10% Protein)
Best for: Tender but slightly structured cookies.
Texture: Tender with a bit more structure than cake flour.
Tips: Great middle ground between all-purpose and cake.
Whole Wheat Flour (13-15% Protein)
Best for: Hearty, rustic cookies (oatmeal, some chocolate chip).
Texture: Dense, nutty, hearty.
Tips: Use in combination with all-purpose (replace 25-50%) to avoid overly dense cookies.
7. How Flour Handling Affects Different Cookie Types
Chocolate Chip Cookies
Flour handling: Spoon and level. Mix just until combined. Rest for 2-24 hours.
Desired texture: Chewy edges, soft centers.
Flour choice: All-purpose or bread flour (for extra chew).
Sugar Cookies
Handling flour : Sift flour. Mix just until combined. Chill well.
Desired texture: Tender, delicate.
Flour choice: All-purpose or pastry flour.
Oatmeal Cookies
Flour handling: Spoon and level. Mix just until combined. Rest for 30+ minutes.
Desired texture: Chewy, hearty.
Flour choice: All-purpose with rolled oats.
Shortbread
Flour handling: Sift flour. Mix gently. Chill before baking.
Desired texture: Tender, crumbly, melt-in-your-mouth.
Flour choice: All-purpose or pastry flour.
8. Frequently Asked Questions:
Q1: Why does flour handling matter for cookie texture?
A: How you measure, mix, and treat flour affects moisture absorption and gluten development. Too much flour makes cookies dry and tough. Overmixing creates excess gluten, resulting in dense, tough cookies. Proper handling creates tender, well-textured cookies.
Q2: What’s the correct way to measure flour for cookies?
A: Use the spoon and level method: fluff the flour, spoon it into your measuring cup until it overflows, then level it off with a knife. Never scoop directly from the bag—this compacts the flour and adds up to 25% more than intended.
Q3: Should I sift flour for cookies?
A: Sift when the recipe calls for it or when you want extra-tender, delicate cookies. Sifting aerates the flour, removes lumps, and ensures even distribution of dry ingredients. For chewy cookies, sifting is less critical but still beneficial.
Q4: Can I use bread flour for cookies?
A: Yes, but expect chewier, more structured cookies. Bread flour has higher protein (12-14%) than all-purpose flour, which creates more gluten. This is great for thick, chewy cookies but may not be ideal for delicate, tender cookies.
Q5: What happens if I overmix cookie dough?
A: Overmixing develops gluten, which makes cookies tough, dense, and dry. Mix dry ingredients into wet just until no flour streaks remain. Stop immediately—no extra mixing “just to be sure.”
Q6: Why do my cookies taste floury?
A: Floury taste usually indicates underbaking or using too much flour. Check your measuring technique (spoon and level) and make sure your cookies are fully baked (edges set and golden).
Q7: Does resting dough affect flour handling?
A: Yes! Resting (chilling) allows flour to fully hydrate, which improves texture and flavor. It also solidifies the fat, reducing spread. Always rest dough for at least 30 minutes, preferably 2-24 hours.
Q8: Can I use cake flour for chocolate chip cookies?
A: Yes, but your cookies will be more delicate and tender. They may also spread more because cake flour has less protein (which provides structure). For classic chewy chocolate chip cookies, all-purpose flour is the better choice.
Q9: How does humidity affect flour?
A: Flour absorbs moisture from the air. On humid days, flour can contain more moisture, which may make your dough wetter and more sticky. On dry days, flour can be drier, leading to stiffer dough. Adjust by adding 1-2 tablespoons of flour on humid days or reducing flour on dry days.
Q10: Can I substitute whole wheat flour for all-purpose flour?
A: Yes, but whole wheat flour is heavier and absorbs more moisture. Replace only 25-50% of the all-purpose flour with whole wheat, and consider adding 1-2 extra tablespoons of liquid to compensate for the increased absorption.
Q11: Why do my cookies spread too much?
A: Spreading can be caused by several factors, including not enough flour. If your flour measurement was light, add 2 tablespoons of extra flour next time. Also check that your butter wasn’t too warm and that you chilled your dough.
Q12: How do I know if my flour is fresh?
A: Fresh flour has a mild, slightly nutty aroma. Old flour may smell musty, bitter, or rancid. Store flour in an airtight container and use within 6-12 months for best results.
Q13: Should I use salted or unsalted butter with flour?
A: Use unsalted butter for baking. This gives you complete control over the salt content in your recipe. If you use salted butter, reduce the added salt by ¼ teaspoon per ½ cup of butter.
Q14: Why is weighing flour better than measuring by cups?
A: Weighing flour is more accurate and consistent. A cup of flour can weigh anywhere from 120g to 160g depending on how it’s scooped. Weight measurements eliminate this variability, giving you consistent results every time.
Q15: Can I add flour to thicken cookie dough?
A: Yes, if your dough is too wet or sticky, add flour 1 tablespoon at a time until it reaches the desired consistency. However, adding too much flour can make cookies dry and tough. Add gradually and assess after each addition.
9. The Perfect Flour Handling Routine
Here’s a step-by-step routine for handling flour like a pro:
Before You Start
- Store flour properly (airtight container, cool dry place)
- Fluff flour with a spoon or whisk
- Set up your scale if using weight measurements
Measuring
- Spoon and level (or use a digital scale)
- Sift if needed (especially for delicate cookies)
Mixing
- Add flour in 2-3 stages (not all at once)
- Mix just until combined (no overmixing)
- Stop immediately when no flour streaks remain
Resting
- Rest dough for at least 30 minutes (2-24 hours is better)
- Bake directly from the refrigerator
10. Final Thoughts: Master Your Flour
If you’re still unsure about handling flour for better cookie texture, remember this: Flour is the foundation of your cookie. Treat it with care, measure it accurately, mix it gently, and give it time to hydrate.
The techniques we’ve covered—spooning and leveling, sifting, weighing, careful mixing, proper storage, and resting—are your tools for achieving consistently excellent cookies.
Mastering flour handling transforms you from a recipe-follower into a truly confident baker. You’ll understand why your cookies turn out the way they do and how to fix them when they don’t.
So go preheat that oven, handle your flour with care, and bake your most perfectly textured batch yet.
Now go forth and handle your flour like a pro! 🍪✨ Oh Check these links out ➡️The Secret to Better Baking: Why You Need to Ditch the Scoop. ➡️Award-Winning Chocolate Chip Cookie